Okay, so I said I was going to do the series of sucky project posts over the course of a week. But here we are, two weeks later, finally doing the last, most horrible project ever attempted. This one was so bad, I had to steel myself to write about it seven months after it occurred. But I'm finally ready to recount the project that almost killed us. Prepare yourself for This Sucks! Part 3: Painting a Stairway to Heaven...
Back in February, we had an unfortunate incident that shall henceforth be known as ToiletFlood 2017. The toilet in the boys' bathroom backed up (thanks to a small toy flushed down the pipe by a previous occupant) and overflowed gallons of water which then poured down like a waterfall through our Moravian star light fixture. It covered our foyer hardwoods in a lovely layer of toilet water and caused over $7,000 worth of damage. Here was the foyer before the great flood.
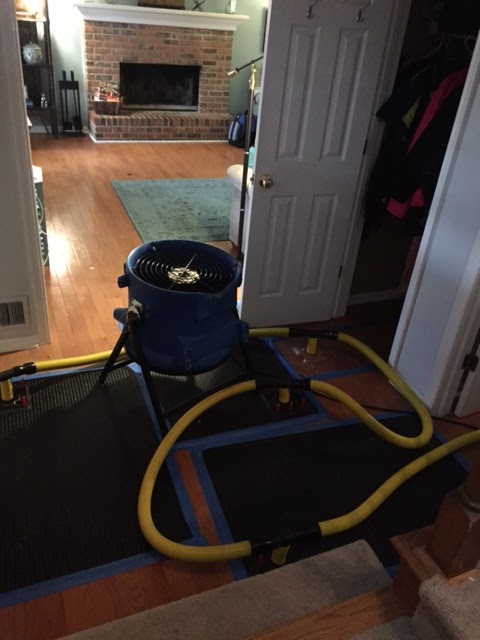
We had to hire a restoration company to dry everything out with their huge, incredibly loud fans, dehumidifiers, and a maze of drying mats. It took three days- three long days of rearranging sleeping spaces, holing up in the bedroom to try to get away from the incessant jet-engine roar of the fans, and yelling to be heard. It was not fun.
Find your fun where you can!!
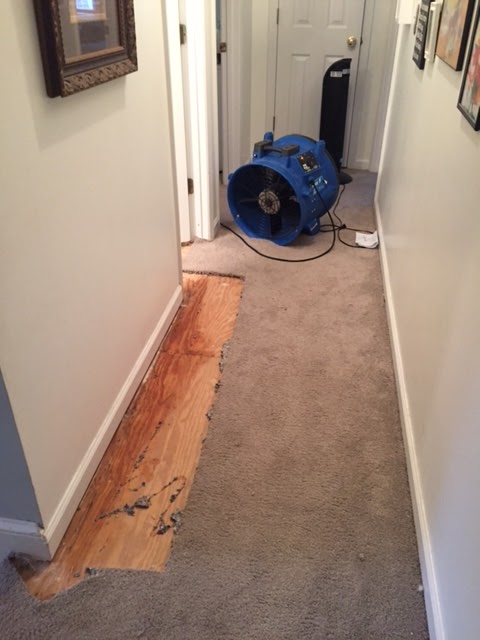
Once the drying was complete, the repairs began. The bathroom tile had to be replaced, carpet had to be ripped out, and we had to replace the foyer ceiling. On one hand, we got to make a few upgrades. The boys' bathroom had carpet in the vanity area, so we were able to replace that with tile, and they got a brand-new, fancy toilet. But on the other hand, we had to tear out carpet that was less than six months old. Since the water overflowed from the bowl, it was considred a biohazard, so any wet carpet had to go. They pulled it out of the twins' room, the hallway, and the stairs.
This used to be the foyer ceiling
We were curious about what we'd find beneath the stairs- plywood, or solid stair treads. We weren't thrilled with the way the stair carpet was holding up. After only six months, it was already looking pretty matted and worn, but stair treads are expensive and look kind of difficult to replace. So the day the stair carpet came up, I was anxiously peering over the workmen's shoulders to see what we would find. Jackpot!! Solid wood treads.

I immediately shouted, "Wait!! Don't put carpet on these!! I'm going to refinish them!!!" They looked at me dubiously and asked, "Are you sure? That's a lot of work..." But I was so sure. I skipped around like a happy bunny, chortling gleefully and calling everyone to tell them about our amazing luck. The carpet guys asked one more time before they left if I was ABSOLUTELY SURE that I didn't want them to carpet the stairs?? I was sure. Well, did I want them to leave the carpet so if I changed my mind...?" Nope, take it. I had never been more sure about anything.
Then our contractor stopped by, and I told him my brilliant plan. He was also quite doubtful and concerned. He told me I didn't know what I was getting myself into, and that I should call him when I figured out how tough it was and decided to go with carpet after all. But I was not phased. I had done my research- I'd read at least three internet tutorials and I knew exactly what I was doing. Famous last words.
I started yanking out the 60,000 staples with great enthusiasm. That lasted about five minutes. Y'all, I cannot even tell you what a pain that was. Wrenching and prying out hundreds, THOUSANDS of staples until I had arthritic claw hands and my back and arms ached beyond belief. It took days to finish, and every one was abject misery. But that was just the beginning.
The stair treads are pine, which is a fairly soft wood, so they had some gouges and dings that had to be filled, along with 120,000 staple holes. Then we had to sand them. And let me tell you, that might have been the biggest, most unholy mess I have ever seen. We taped the foyer off with plastic, but it didn't matter. No matter how many times I've cleaned the walls, there's still a fine layer of sawdust lurking everywhere I couldn't reach. It was HORRIBLE, and it took HOURS.
Then it was time to paint. I had originally planned to stain the treads and paint the risers, but we realized that the bottom stairs had oak trim and pine treads, and there was no way they were going to take stain the same way. Instead of trying to fight that battle, I just decided to paint the sons of bi.... guns. I used Sherwin Williams porch paint in Peppercorn because it's made to withstand lots of foot traffic, plus I wouldn't have to put a sealant on it and worry about slippery stairs of death.
But it's awfully hard to paint stairs when that's the only way to access your children's bedrooms. So I had a system- I painted every other stair. Once those were dry, I started on the next set. I used hot pink post-it notes to show the kids which stairs were safe to step on and prayed that no one would lose their footing. This was slow-going, obviously, and I still had to paint the risers and trim- which required so much taping and so many touch-ups. All-in-all, it took about two weeks. And I still haven't taken the rail down and painted it, because I'm still suffering PTSD from the stair project. Oh well, maybe someday. We finished the landing with some leftover hardwood flooring we had in the attic, and the project from hell was finally done.
Only step on the stairs with post-its!!!!
Even though this was the WORST, MOST DIFFICULT project that we have EVER attempted, dang if it wasn't worth it. It makes our closed off, cramped staircase seem so much brighter and more open. And the stairs are holding up sooooo much better than the carpet. I think we have two scratches after seven months of heavy use. So, while I would never encourage anyone to do it, and I totally understand why the carpet guys and out contractor doubted me, I'm really glad we did it (and that I showed those guys!! Don't doubt a determined woman.)
Bruce the Moose stands sentry over the stairs